Projects 2010
Working on a PROJECT ?
Please pass it along.
Clickon
image to ENLARGE

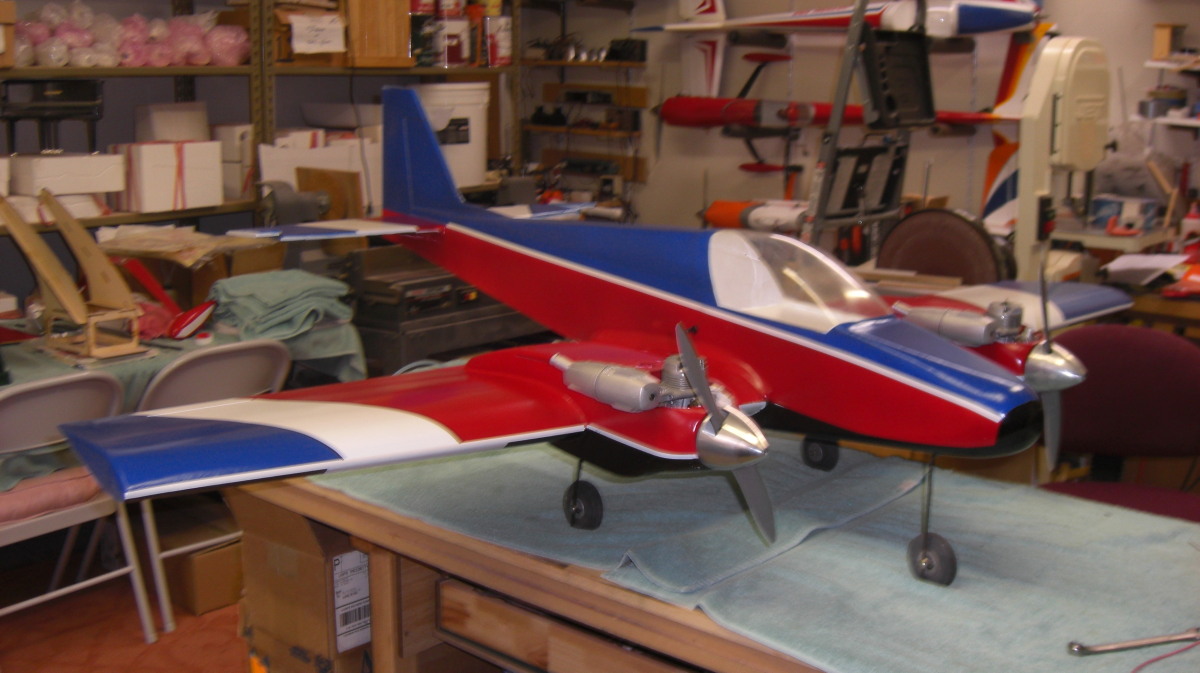
December 25
This is a LA-1 pattern ship from
the early 90's. I flew one then and it did very well for me. This is
the sister ship I never got around to building. They are about
impossible to find today and would probably bring a good price.
The plane is fiberglass fuse with foam cores and sheeting. Has
mechanical Supra retracts and uses an OS 61 long stroke with pipe. I
have put a new 2.4 system in it with all digital servos. When the
mechanics are finished will paint fuse and mono the wing/stab surfaces.
Mel Graham
|
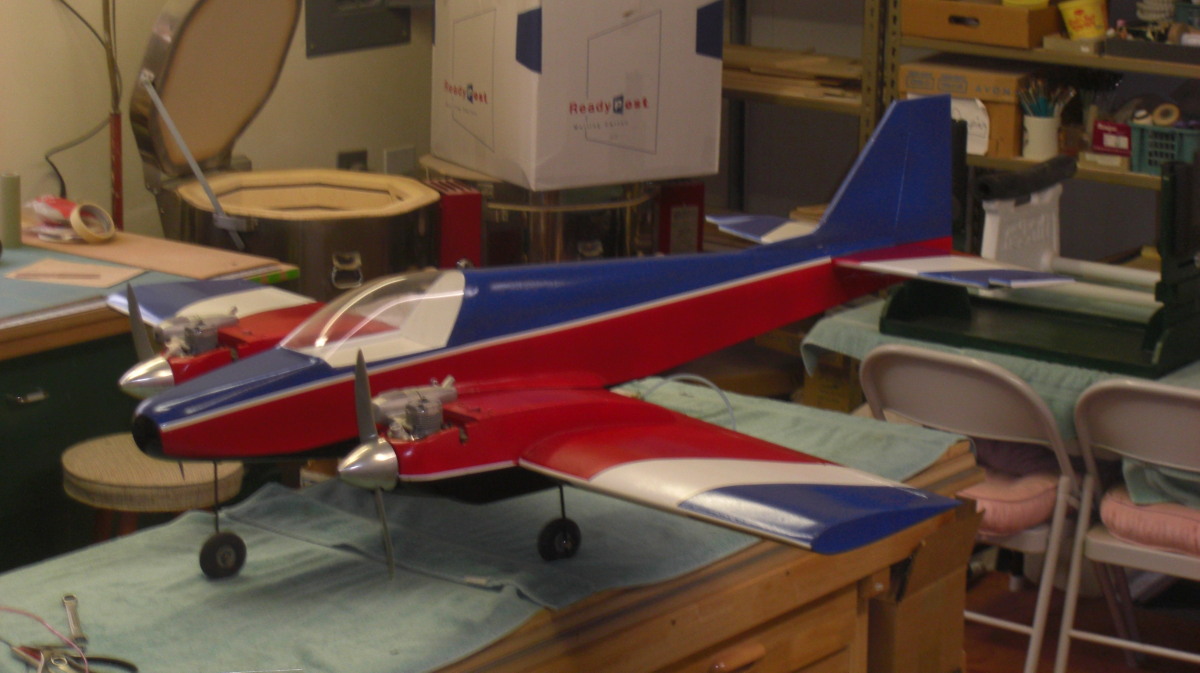
Twin Ultra Update Mel
Graham (see Jan 14)
|
December
14
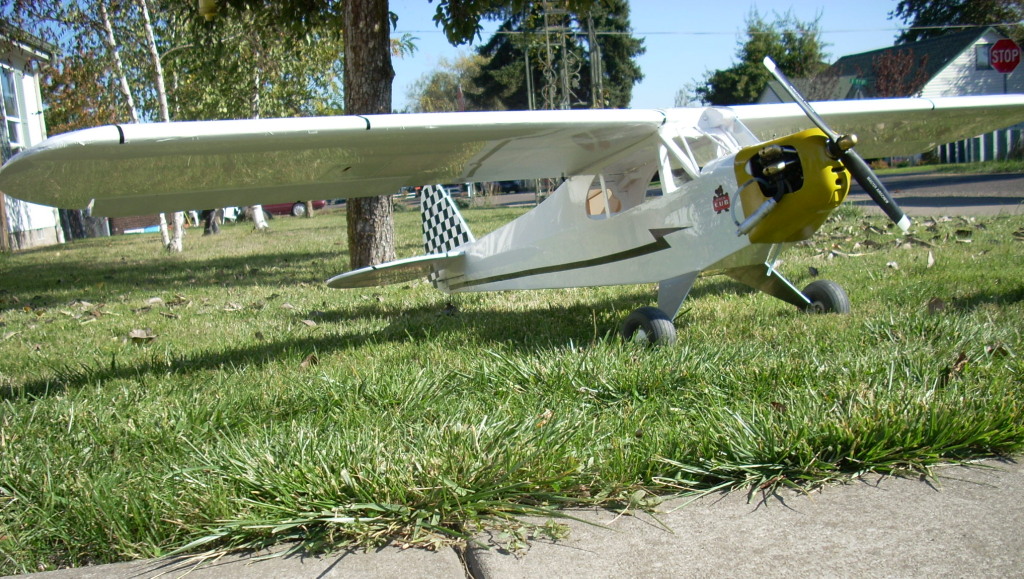
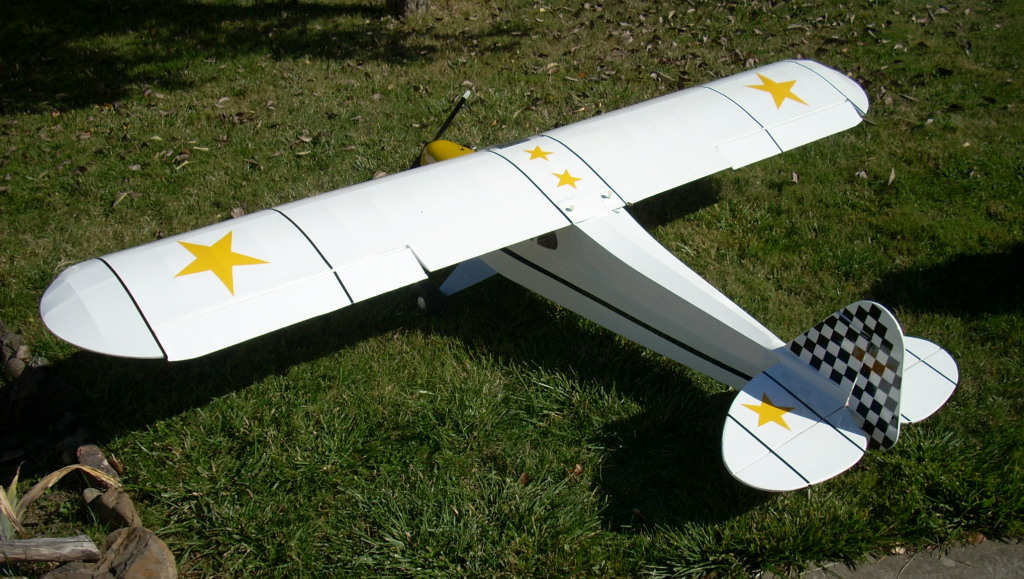
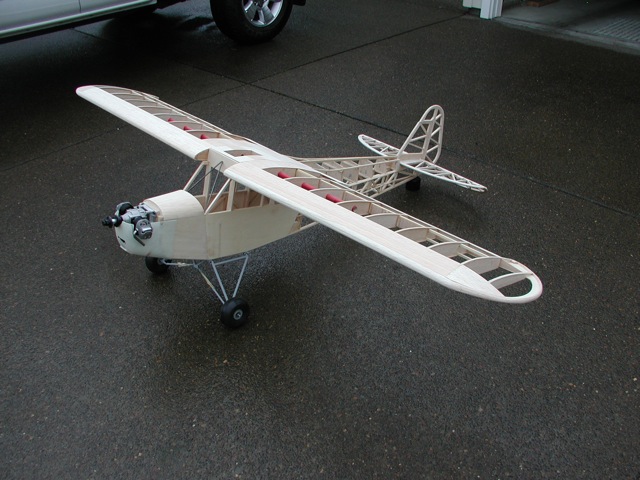
MY 1/4 SCALE CUB IS DONE. IT
HAS A SAITO 80 GK AND FUTABA ELECTRICS IN IT.
CHICK
|
December
13
December 8
|
|
Bonzo
UPDATE
As you can see.
it's done!!!!
I have to balance it, (and put on the Blue decals), then wait for the RAIN to stop !!
Marty
|
October 12
|
|
Bonzo is
coming along!! I did a weight and balance check ( CG ). And not
to bad. I will have to add weight to the tail, Install 3 servos in the
tail and place the battery at the trailing edge of the wing.. all
normal stuff..
I did weigh it when it was balanced and I am under my
estimated weight. It weighs 11 lb. I still think dry weight
will be 12 lb . With covering and cowl and can-o-pee mounts. The
muffler is 8oz so YEP 12 lbs. it will be.. Should be a rocket
with the Moki 1.8
Marty
|
October 7
Maiden flight of
SkySurfer
with GoPro
Well she flys with the camera aboard!
Now all I have to do is work on the pilot's flying skills.
Lennie
|
|
September
24
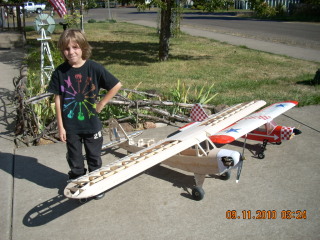 |
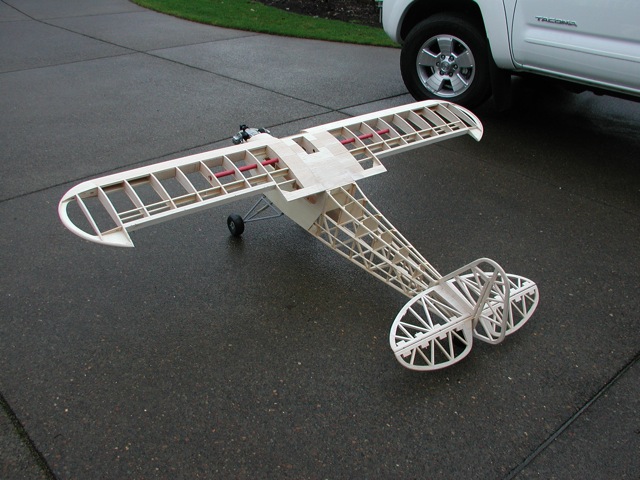
CUB
HERE IS A PIC OF
MY NEW BIRD ALL FRAMED UP.
60 SIZE CUB 90" WING SPAND SAITO 80 FOR POWER .
THE PEE WEE IS MY GRANDSON SETH .
CHICK.
|
September 23
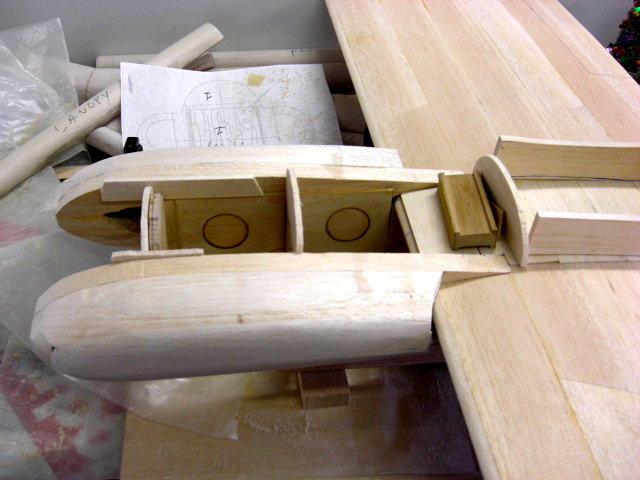
BONZO
09-23-2010
As you can see I have been busy ( the
rain is good for something ). The can-o -pee is cut and detailed.
The cowling is cut and needs detailed. I have spent a lot of time
on little things like , cowl cheeks to wing faring top and bottom,
fitting the engine to the cowling and sanding sanding and sanding. (one
of my favorite things).
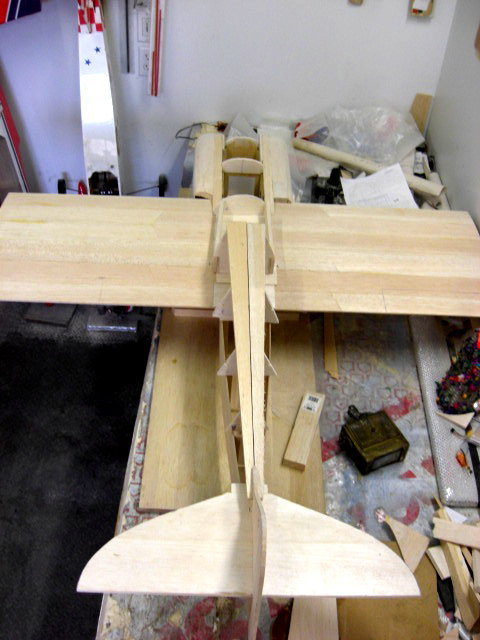
It has been an interesting build but it
is structurally complete. Now comes ALL the little things that has to
be done. I still have to make wing mount to fus and a mount for
the cap-o-pee and make some “ L “ brackets to install the cowling. None
of witch are difficult. Then start installing the control linkage
for elevators and rudder. The wing has to have ailerons cut in
and hinged and wires run for the servos (holes are already in the ribs
for this purpose). When I build the wing I did plan ahead and installed
servo mounts and the wing hold down hard wood. So just a matter
of remembering were they are!!.. (No I marked the plans )
The engine is inverted and the exhaust
will be the biggy. I would like to put a Pitts muffle on it but I
don't have the room front to back and a inverted side mount will be
cause to remove the left side of the cowling. Well that's not an
option ether.. So what now ?? Looking at the plain, one would say
the cowl cheeks are huge and they would be right, (all made to scale )
however, they are hollow inside and the cowl cheeks would be a good
place for a muffler. I'm guna have to design and build one, but
that is where it's guna live. It will be easier to make the
muffler if I don;t have to worry about muffler pressure, so I have
researched it and I will put on a Perry VP-30 pump on it. No
muffler pressure required.
A lot of you have asked when BONZO will
be done? Hell I don't know. It depends on the
weather. The more it rains the more I work on it. However I
do hope the flying season is not over yet!!!! So if you see rain
then you will see BONZO real soon. I'll keep you posted!!
Marty
|
September
20
September
8 - Well the rain has got me back on Bonzo. Here is the update and some
pics!! - Marty Wittman photos
September 3 - THIS IS _*MIKE'S*_ NEW PLANE I JUST
GOT DONE DOING! - CHICK FOSTER
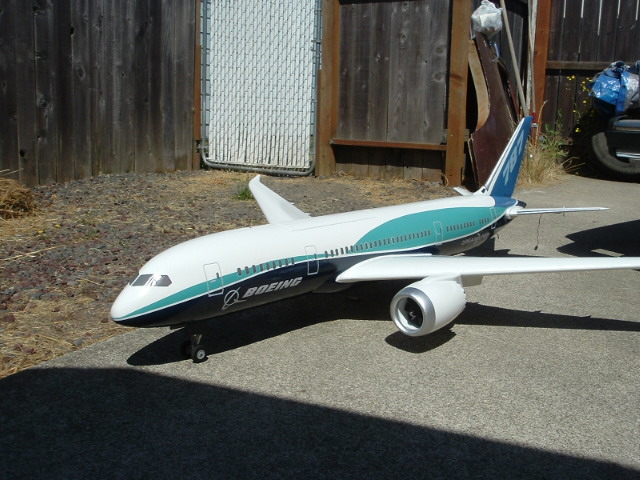
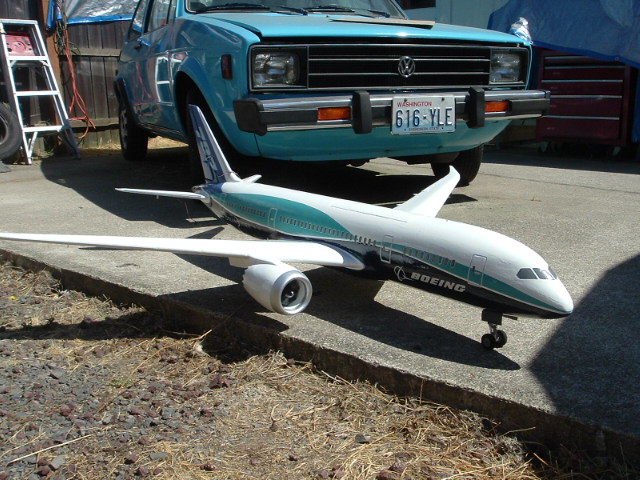
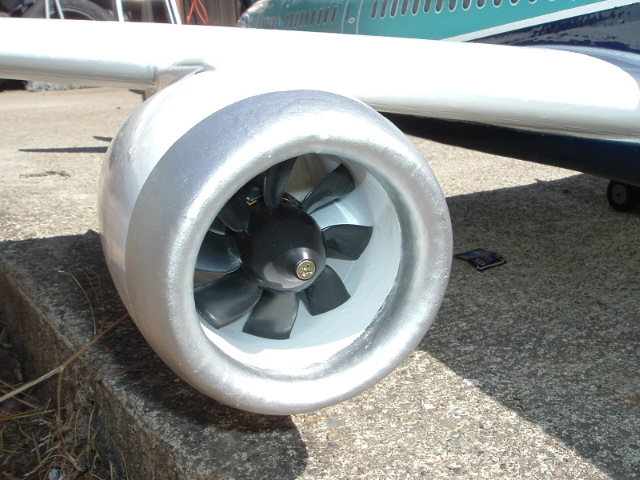
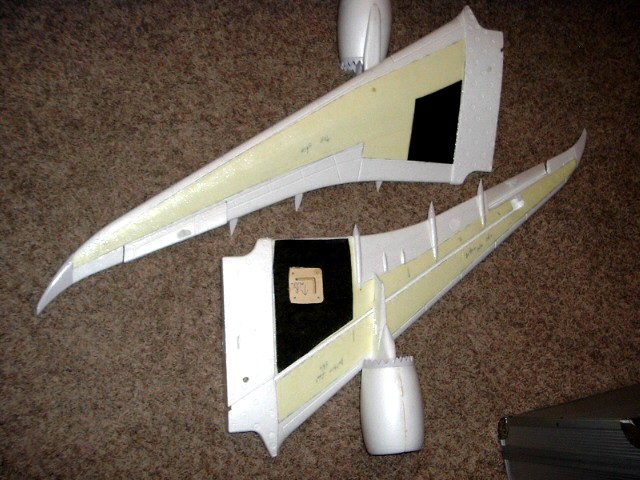
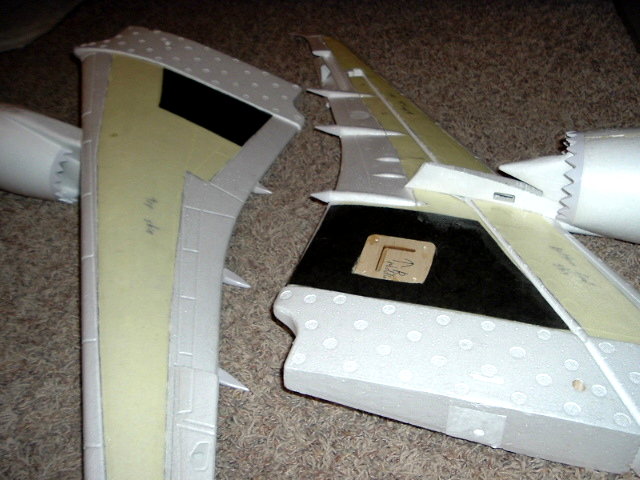
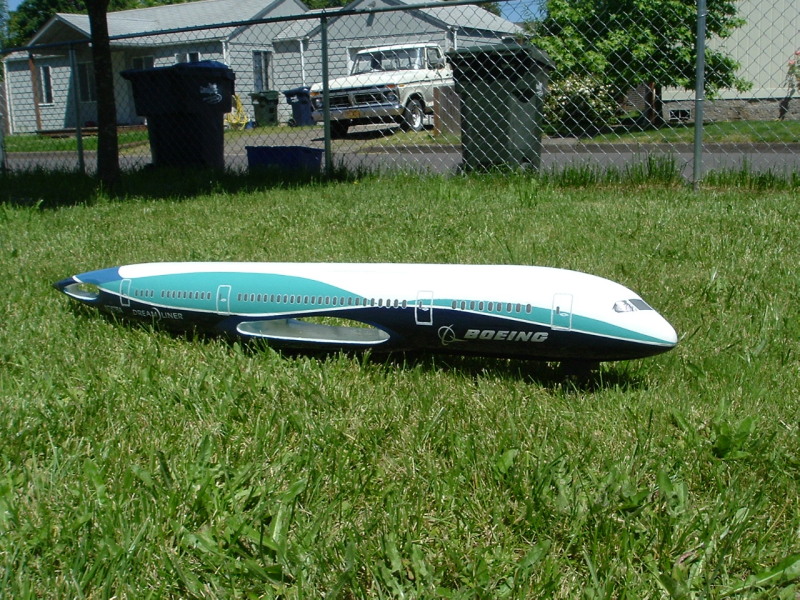
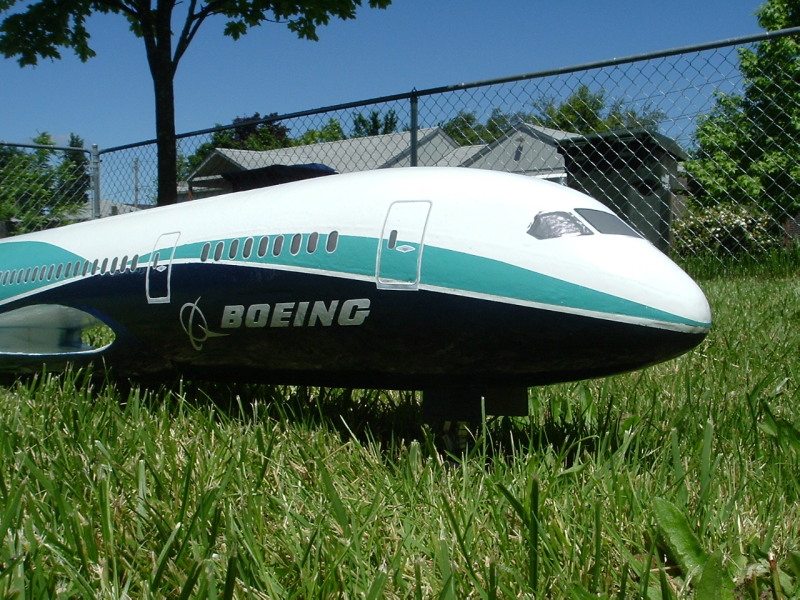
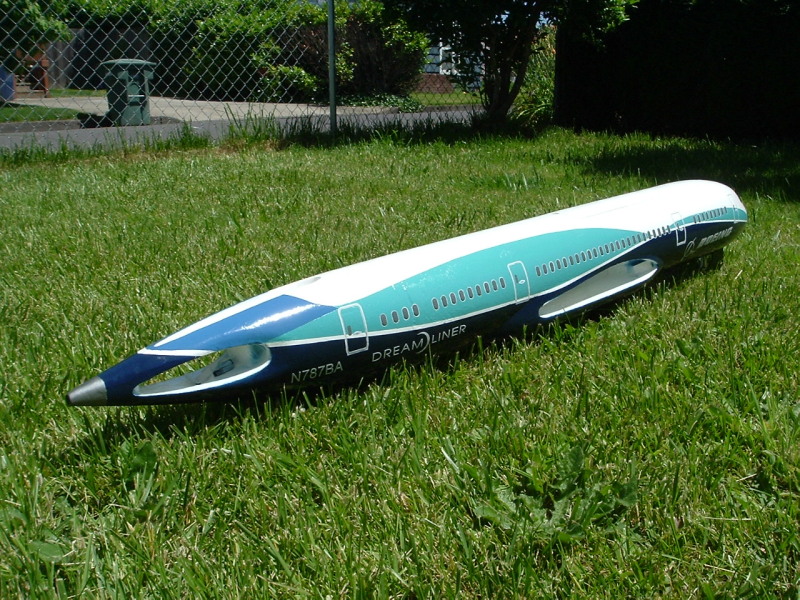
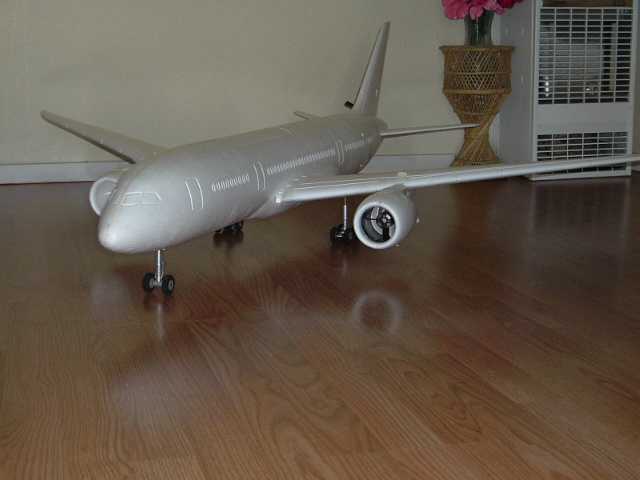
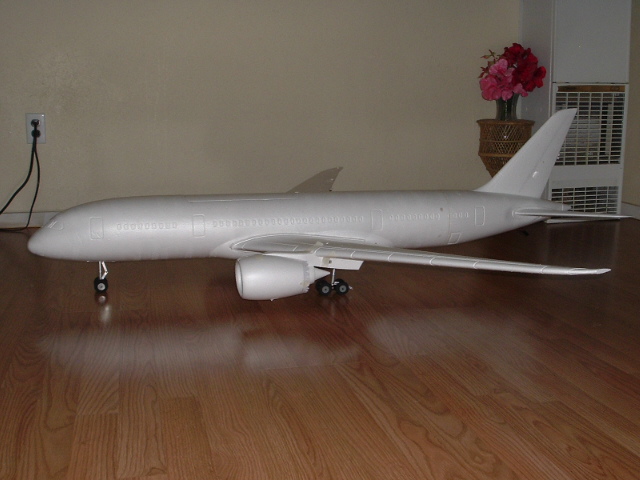
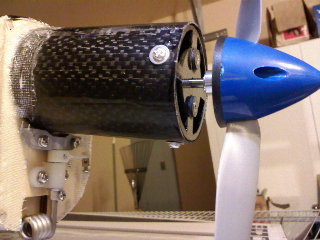
July 28 - B787 about 80 percent finished. Some
painting needs to be done and the remaining electronics installed.
Check out the special multi blade fan! Mark Cross
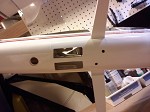
July 16 - (See June 21 and June 14) -
The wings are Kevlar which is the yellow portion for flexible strength
and the black is carbon fibre over kevlar where the landing gear is for
high strength. The rest is fiberglass. I will be painting soon - Marc
Cross
June 27 - WELL SHES ALMOST READY TO HAVE HER MAIDEN
FLITE JUST A FEW THINGS LEFT TO DO. - CHICK
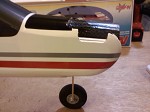
June 21 - EDF B787 that I just finished with the
epoxy and fiberglassing and painting of the fuselage. - Mark Cross
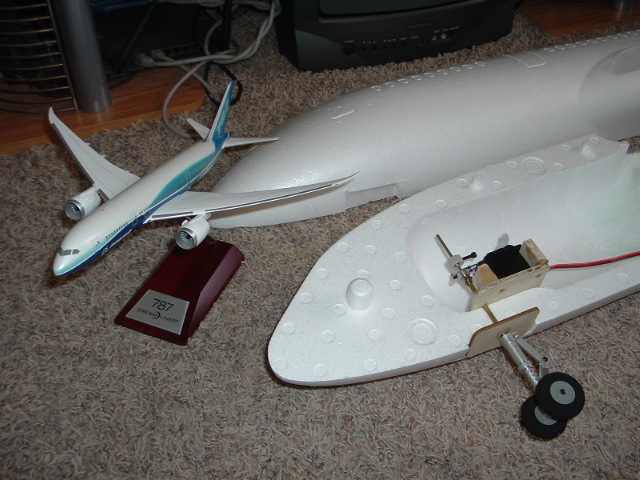
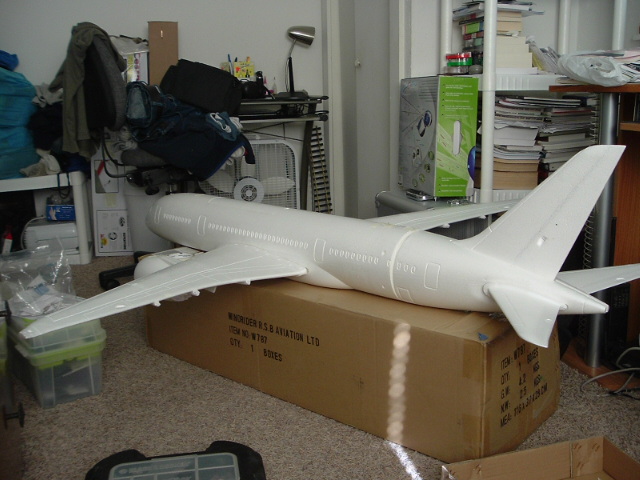
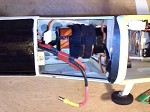
June 14 - I have a Boeing 787 ducted fan aircraft I
am putting togetherit uses twin 70mm EDFs 70 in span and is fiberglass
over foam with carbon fiber for stress areas. Landing gear is
machind aluminum with functioning oleos. The model is licensed by
Boeing that comes from a company in Kent Whashington. If I have the
time I would like to have ready for flight before September. I still
have to install the flight servos and finish and paint in Boeing
colors. Steering servo is installed andfuselage is completed. More to
come - Mark Cross email mchartmann@yahoo.com
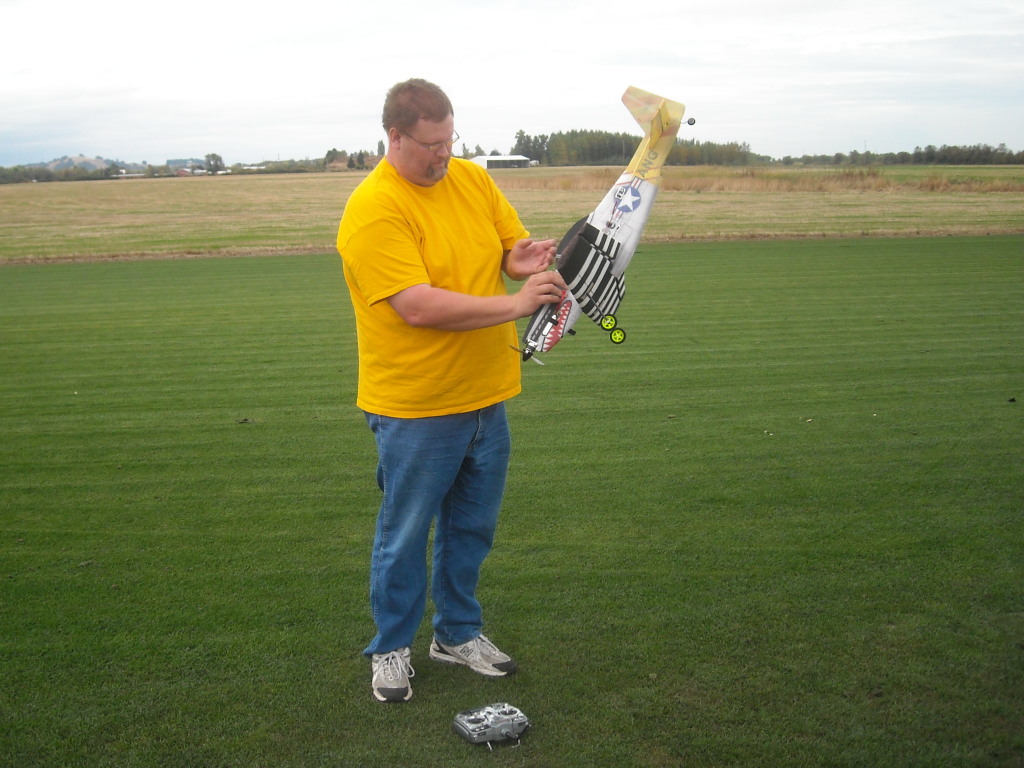
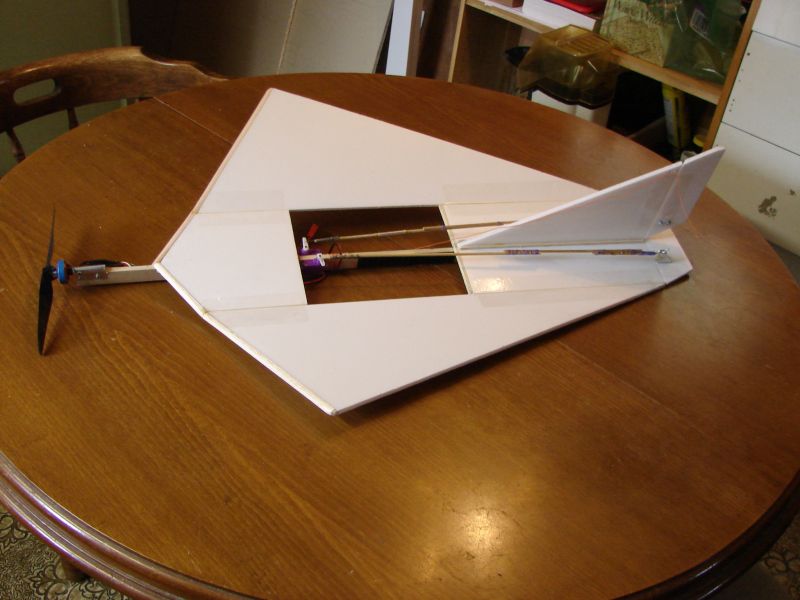
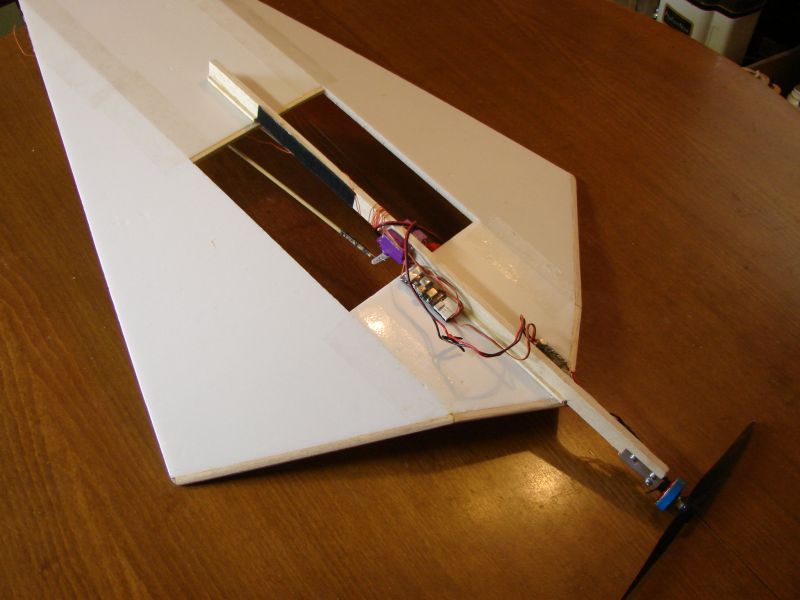
May 10
- This is a scaled up version of the stringless wonder that was in the
latest AMA magazine.
Have not test flown it yet. Weight 6.5 Oz. Span 18" Length
30".
Rich . - Rich Richardson photos
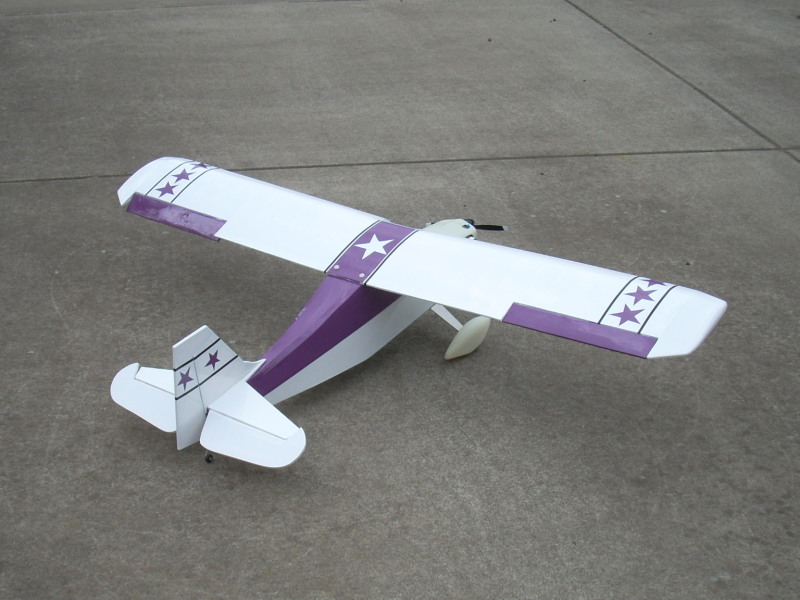
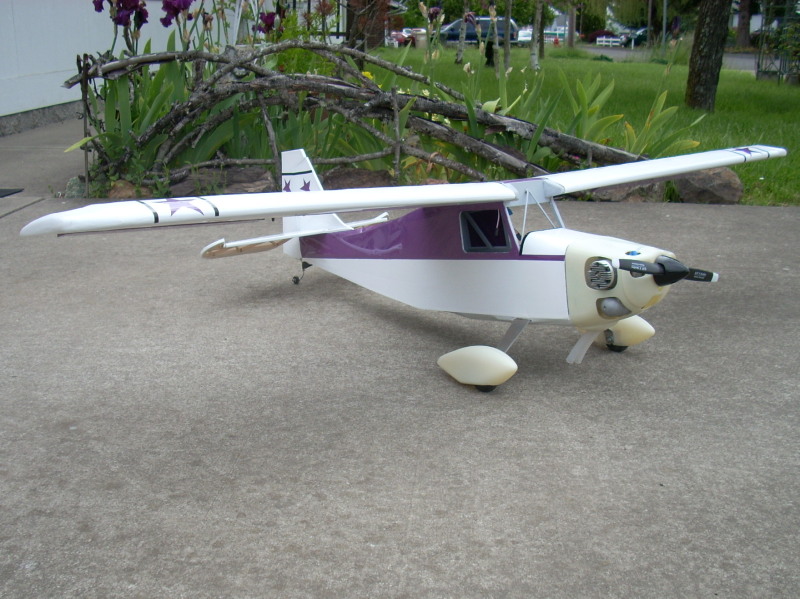
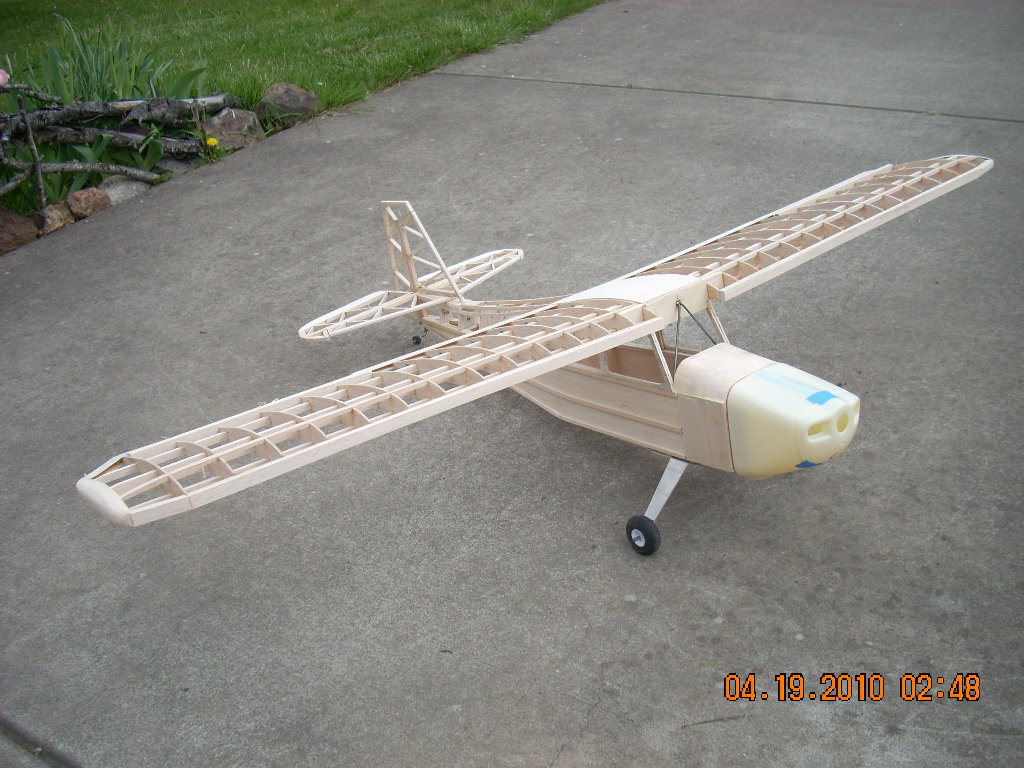
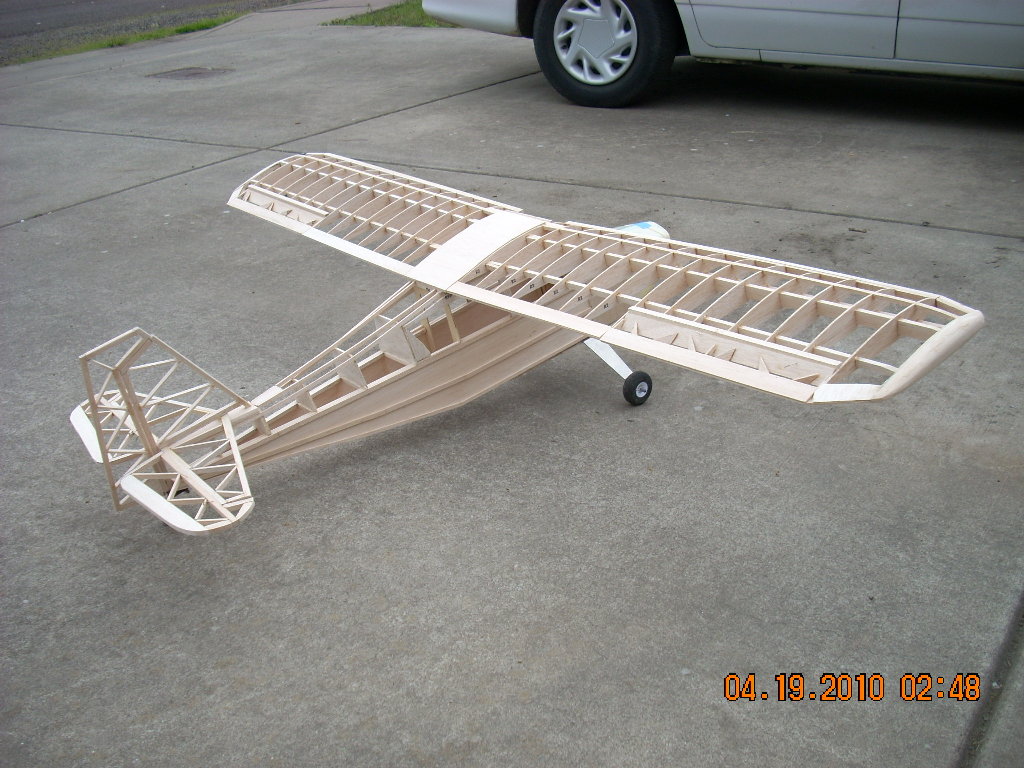
April 29
-
Here are a couple pics of the plane I'am building, SIG Citabra. all
framed up. I'am putting a 61 Magnum in it. - Chick Foster photos
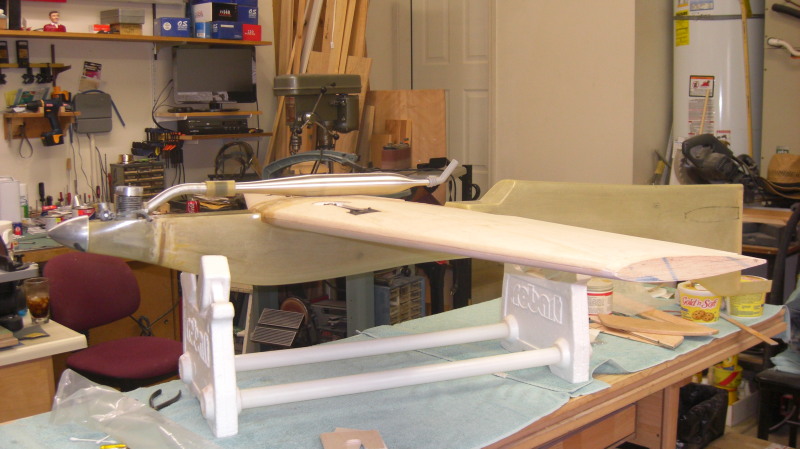
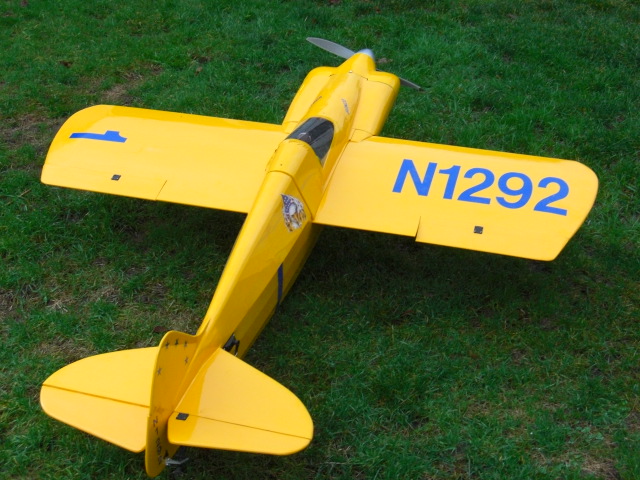
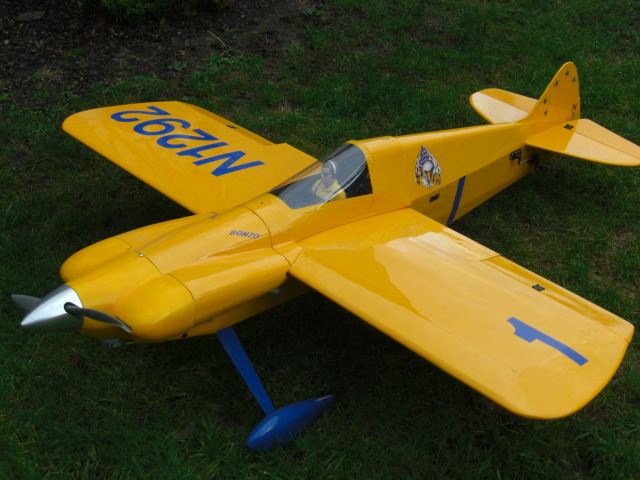
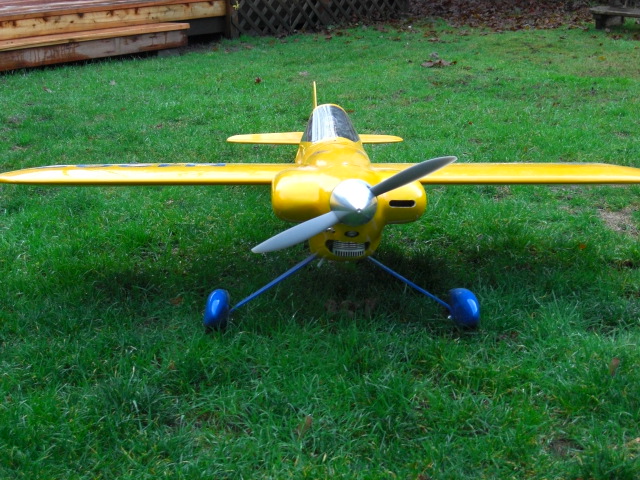
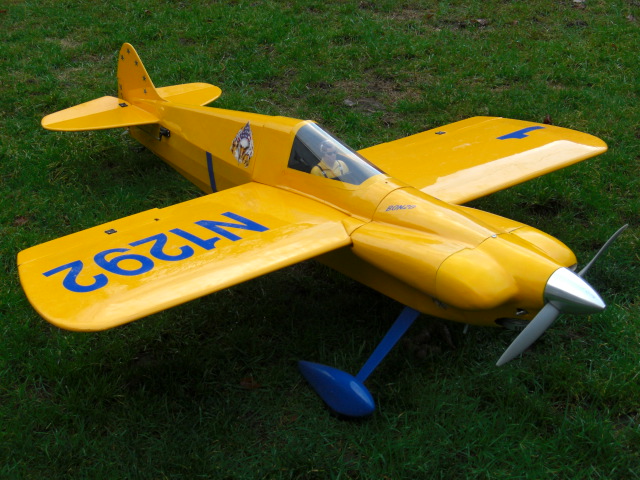
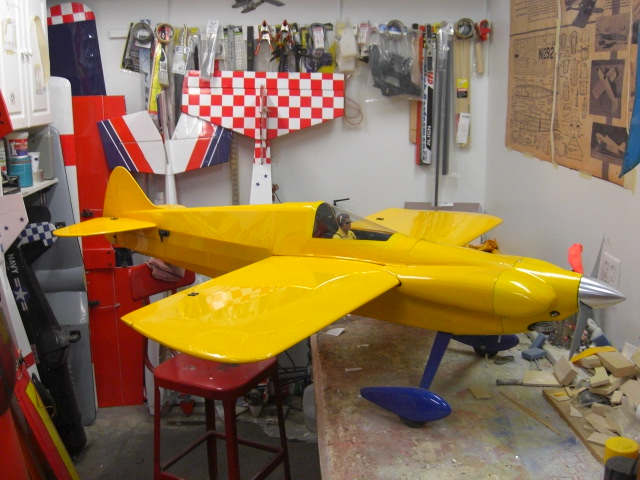
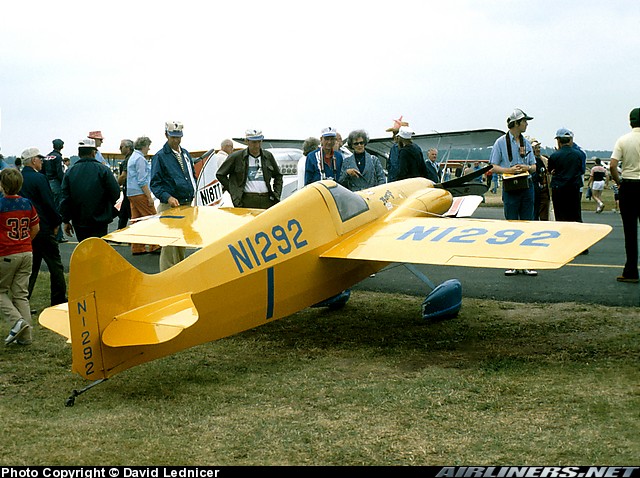
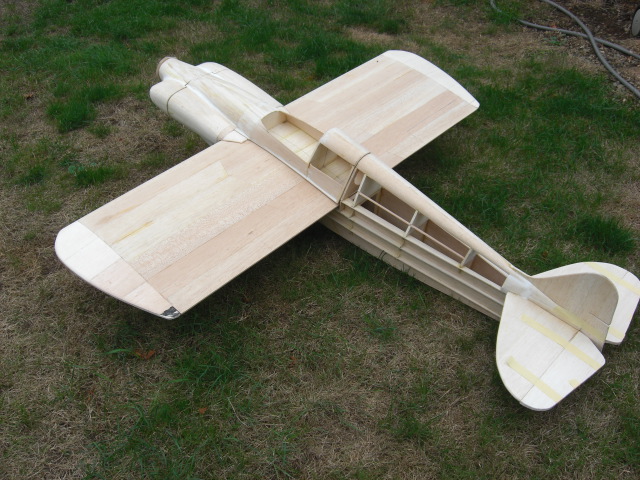
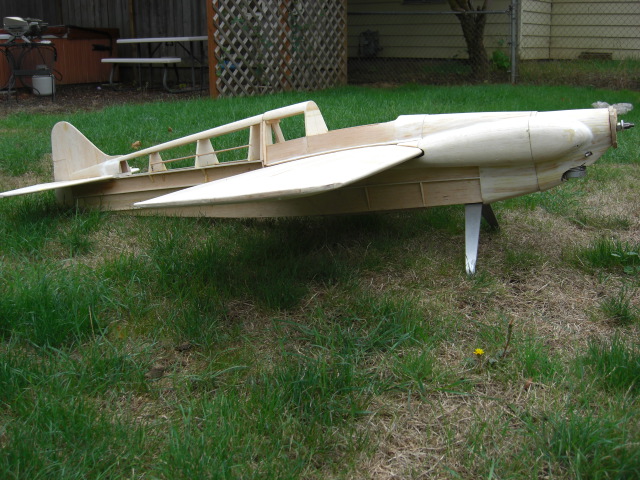
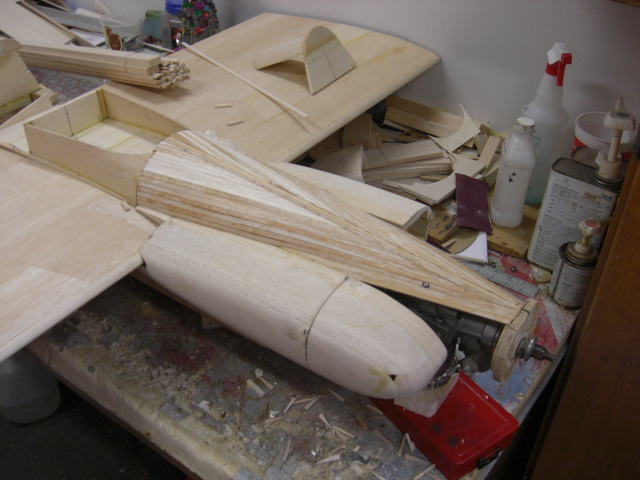
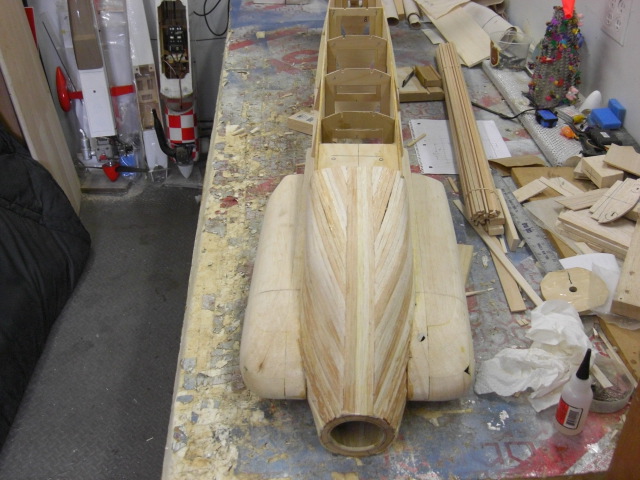
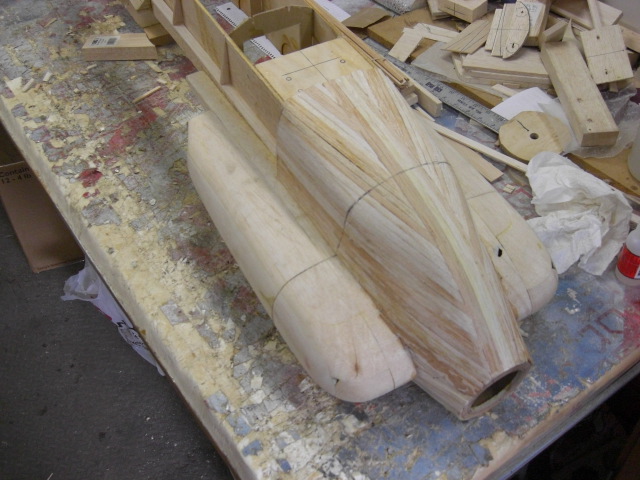
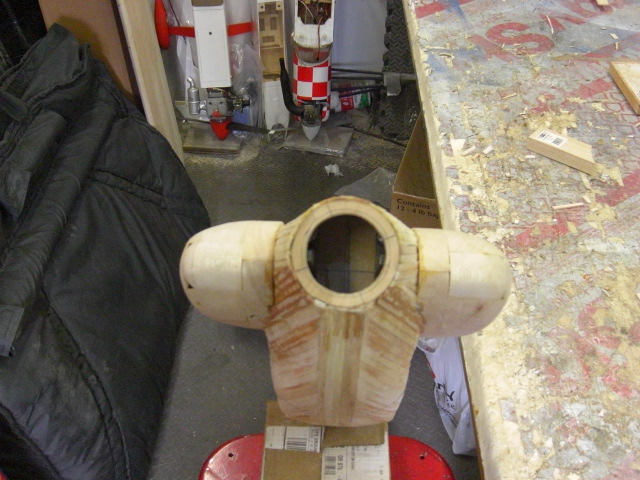
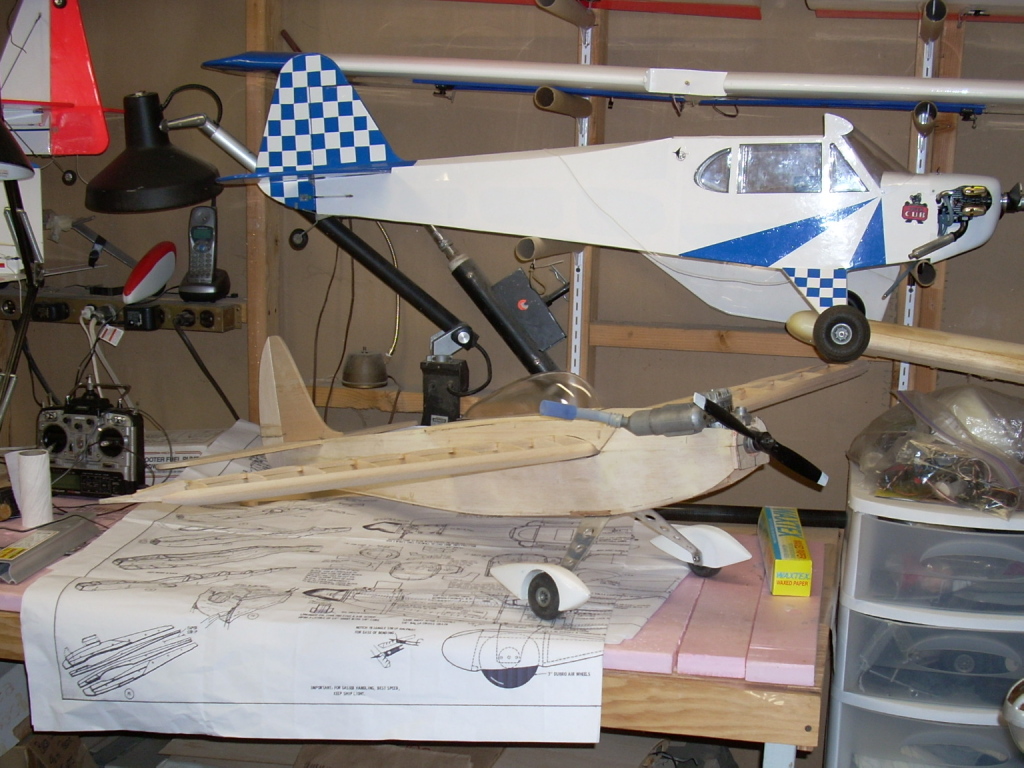
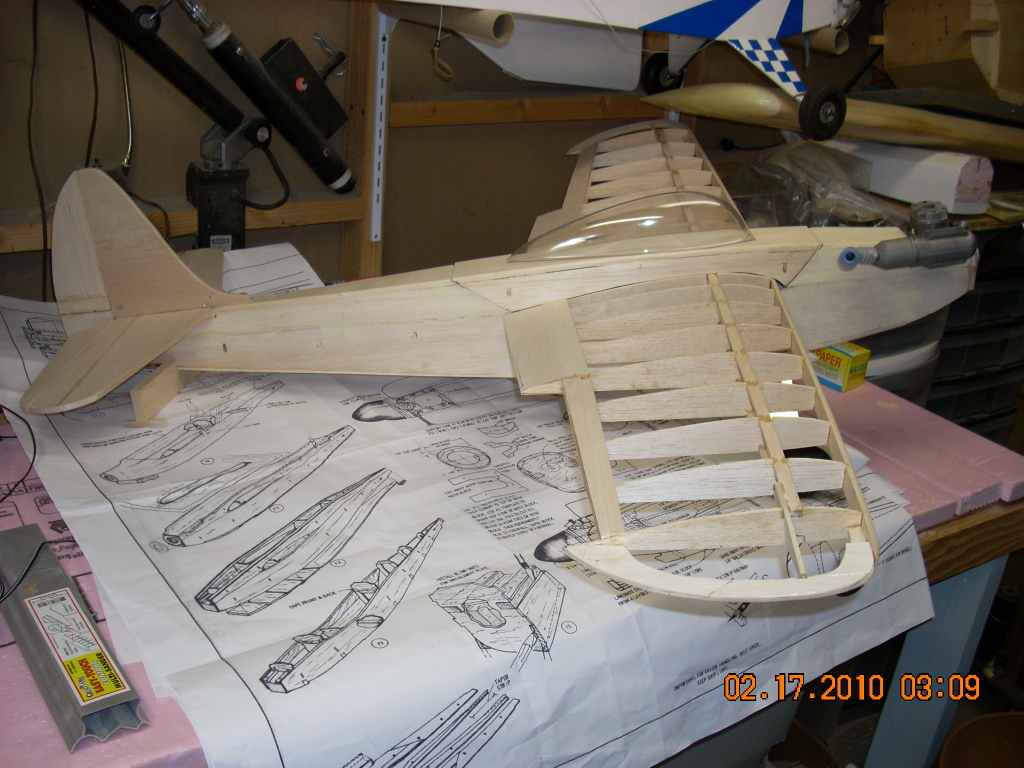
Feb 17 -
Here are a couple pics of my winter project, a scratch built Shoestring
Racer. - Chick Foster photos
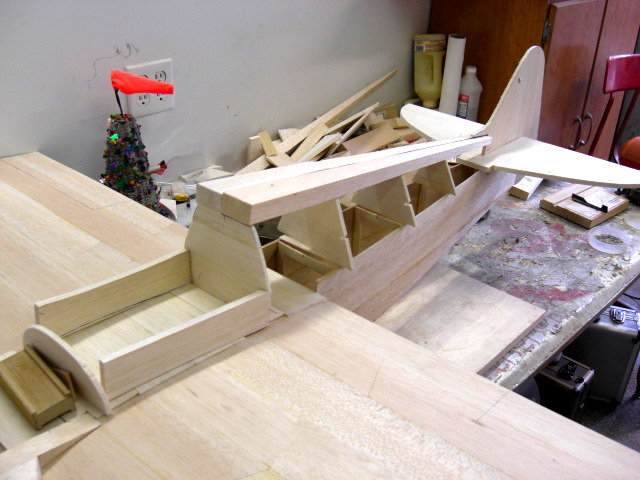
Feb16
- Marty Wittman photos
|
|
 |
 |
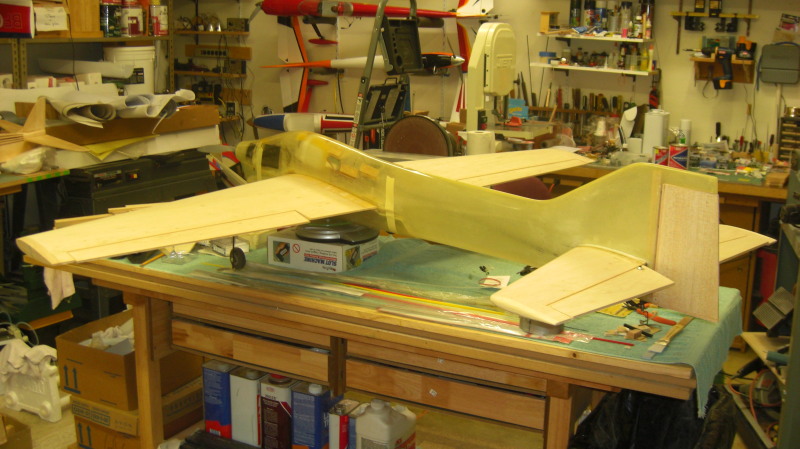
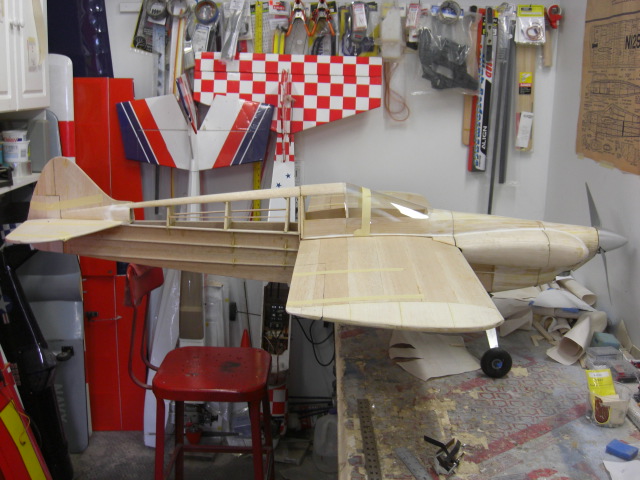
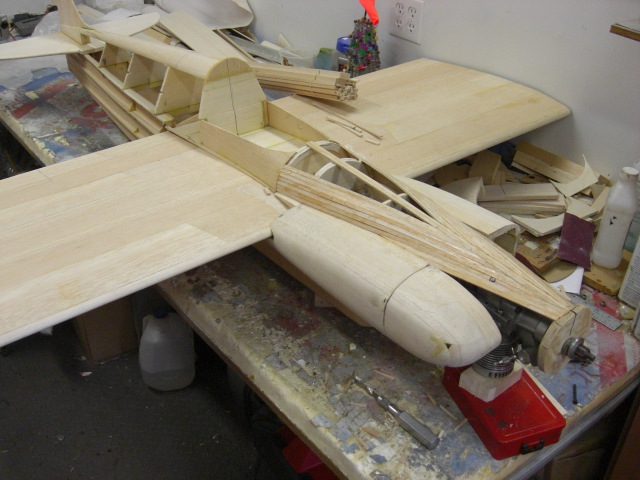
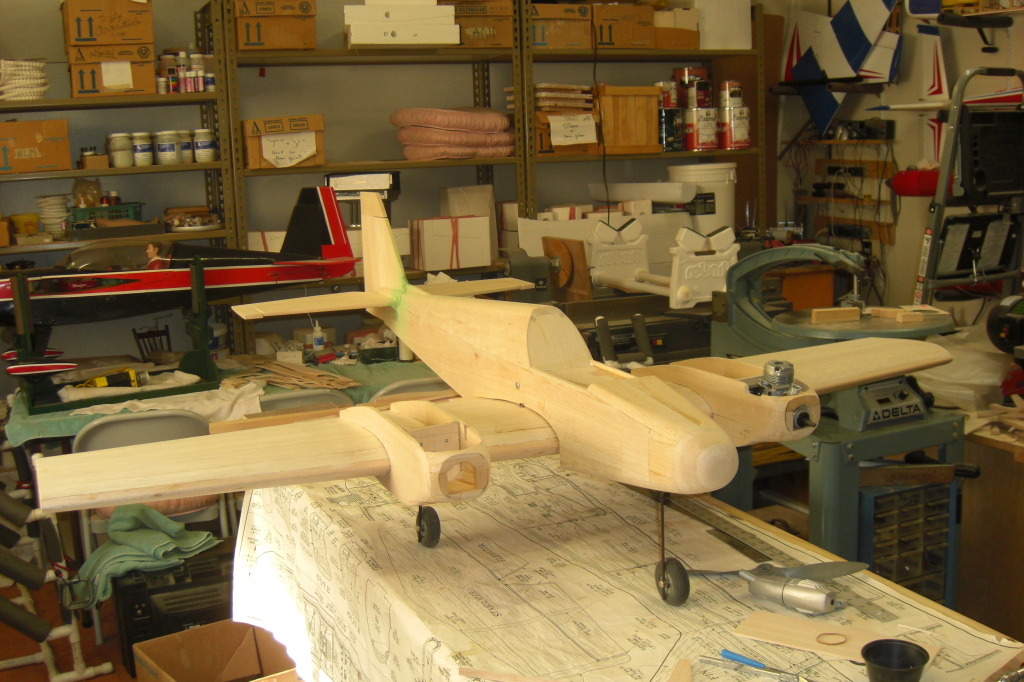
Bonzo
UPDATE
The fus is together, the wing is
built. I have to add the tips and cut the ailerons in. When I was
building the wing I also installed the servo mounts after sheeting one
side. Witch takes some planning. Well, not enough planning on my
part because when I went to sheet the other side. The servo
mounts were on the wrong side!!.. I don't like the servos on the
top of the wings !! ( GRIN) Oh well. No matter how long you
been building ,you still make mistakes!!!...
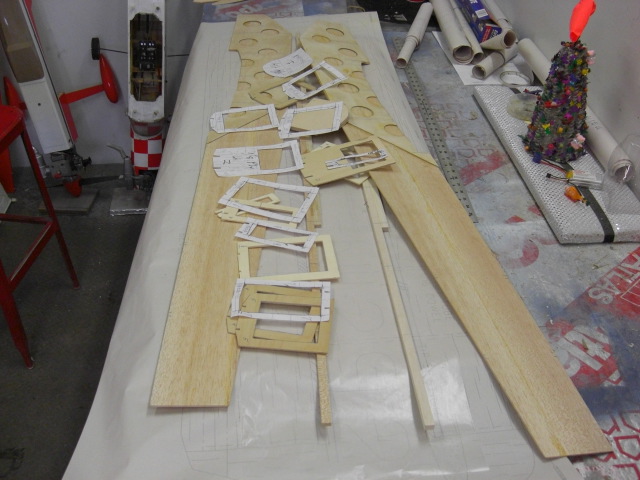
OK. On to the fun stuff.. I am
finding out that the plain has to be built all at one time and all in
one piece. You say,, How can that be??? Well sense the
planes are for a U-Control of a very small size (28in wing) and the
wing is glued to the fus and then the tail is glued and then you build
the turtle deck and canopy and then build and install the cowl cheeks (
The cowl cheeks also hold down the front of the wing) and then build
the front deck along with the cowling ( top and bottom) making the
plane a one piece airplane. All of witch are built over the wing. Geee
, That would be easy to do, But this wing in 62in and has to come off
,however, It still has to be built in one piece.
I do have most of the pieces cut out
and fitted. I just haven't figured out yet how this is guna work
? I fit all the pieces on the fus ( you got to love pins) ,stand
back and look. Then try to figure out were to start? I
think I will start with the horizontal and the vertical and build
forward. That would be ,Tail feathers, turtle deck, canopy, front deck
and cowl cheeks and cowling. In that order. Well, I'm not ready for
that yet!!!! I can't get the wing off with the cowl cheeks on so
I got some head scratching to do there !!!! I may have to redesign the
front wing mounts !!! Anybody starting to think ARF ,yet??
The one big problem I am having now
is what engine do I put in this thing? I have a Sato 91 that I thought
would work but as I build and see how big Bonzo is going to be I don't
think the 91 will do it!!!.So that brings up other problems. Like
firewall to back plate distance. Do I move the firewall back or do I
make the cowling longer!! I have measured that distance on my other
planes that have gas engines and it varies from 5 ½ to 6
½ inch. Bonzo's plans from firewall to back plate in only
4 1/2inch.
<> Yep!!! One of many problem of scratch
building. Weight and balance has to figure in here also. I am
beginning to see why there are less and less scratch builders out here.
However I do enjoy what it take to get one of these in the air.
To Be Continued..... Marty
Wittman
Bonzo
Update....02-16-2010
|
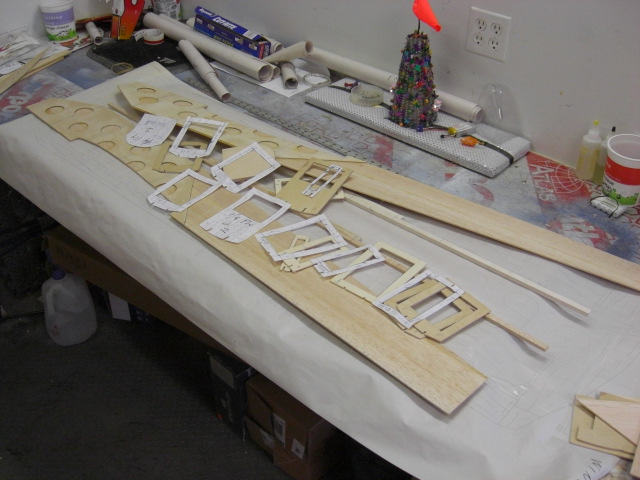
Jan 19
- Marty Wittman photos
|
|
 |
 |
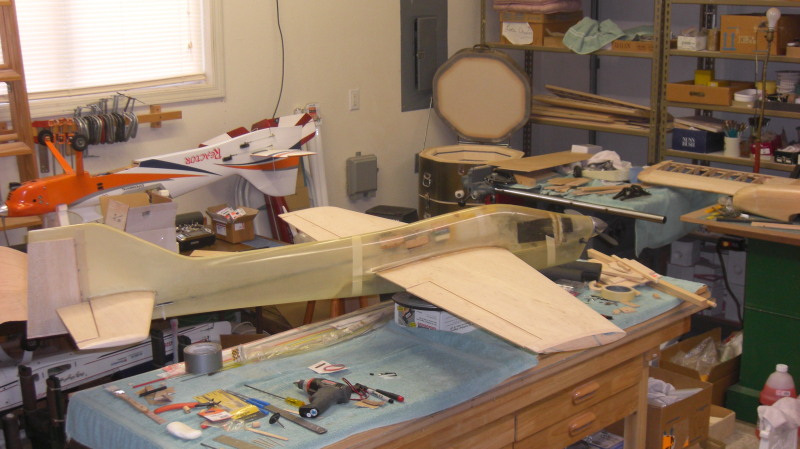
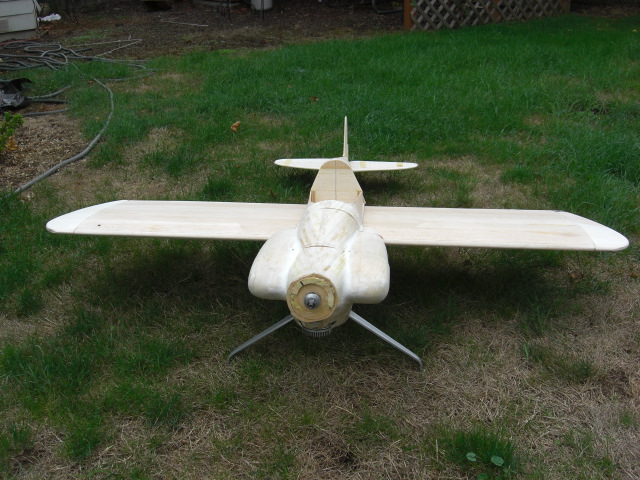
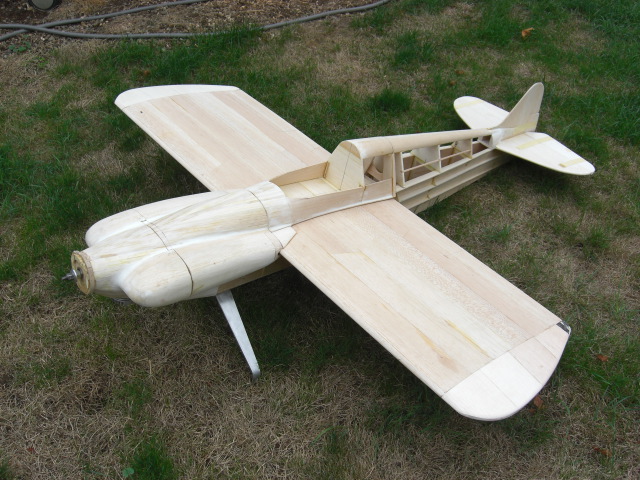
Bonzo
is on the boards!!!!!
It must be raining! I got the itch to start working on Bonzo so
off to the man cave!!!!!
When you only have a set of plans and no kit to
start to build you have to start someplace. So the first thing
you do is cut out all the parts you will need for the kit out of paper
(that's why you make a copy of you original
planes) then you have to transfer the paper cut outs to the woodso you
can cut them out to make a kit to build !! You have
to really , really like building.
All the pieces are cut for the fus and the fus sides
and doubler are cut and glued together. No I haven't put the fus
together yet. How ever, the wing saddle did take some time to draw out
and then cut the wing saddle into the fus. You see the wing
saddle has to be 100% right!!!!! My problem is that I am only a
99 % guy so it took me a lot longer to get it to 100% ! The
wing on any airplane is the basses for all other setup to the plane.
The stabilizer is set to the wing. In the case of Bonzo it is a 0 % -
0% incidence The wing is also centered on the thrust line
as is the stab and engine. So the wing has to be at 100 % It took
a lot of measuring and more measuring and checking and rechecking but
after a bit ,, you say OK cut it, right or wrong!! I did
and we will see how it goes..
The wing is pretty straight forward. I
thought. If I could build the wing to the plans it would be, but, and
this is a big but!! The original plans are for a U-Control plane
with a 28inch wing that has the wing glued to the fus. along with the
canopy to make a one piece airplane. Well,now that I have the
wing up to 68inch and it's guna be an R/C plane there is a lot of
redesigning to do. Besides, I don't have a truck that big to
carry it in one piece. So the only thing I can say about the wing is.
It is in the design stage!!
Lets see, The only thing I have to do is..build the
wing/ Mount it to the fus,/ build the turtle deck and canopy
along with the front top and then CUT THE FUS to get the canopy off so
I can take the wing off and then design a mounting system to put it all
back together.. WHY?? WHY ?? WHY?? didn't someone talk me it
building an ARF of some kind, any kind!!!!
Oh Well
More to follow!!!
Marty Wittman
Jan.
12 2010
|
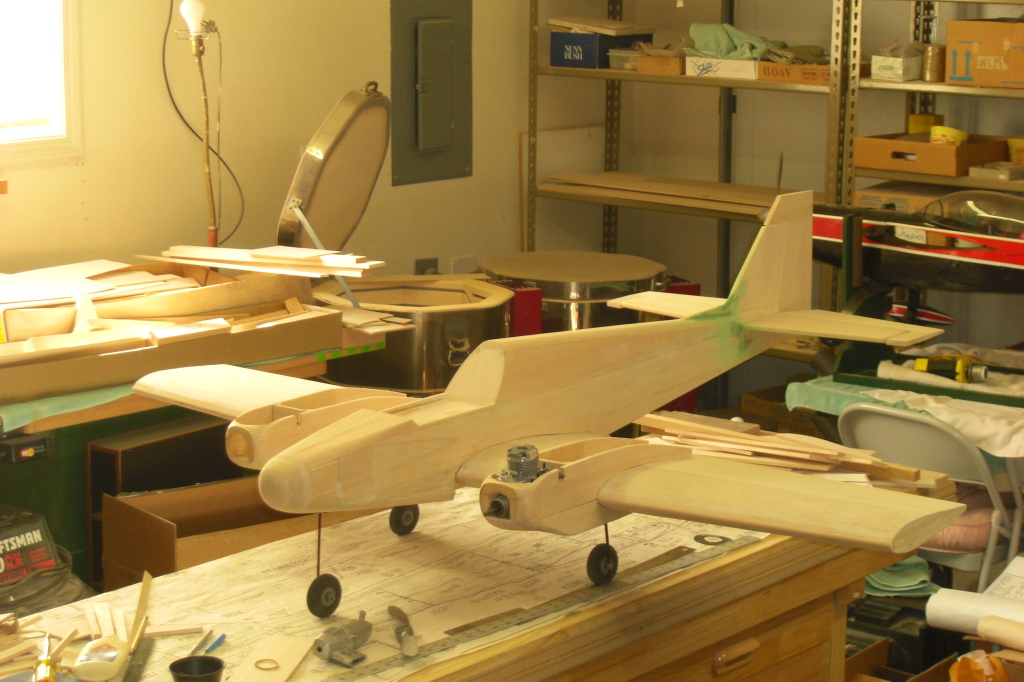
Jan 14
- Mel Graham photos
|
It started as a
Ultra Sport 60 kit
I have modified it to a
twin with two OS 46 AX's. The fuse has a new nose and I modified the
tail surfaces to
provide more area. It has retracts (tri) and the wing is fully
sheeted. I added glass cloth with water base poly urathane.
About six coats of poly, final two had
talc added for a filler.
The pictures do not show the latest stage. It has two coats
of auto Advantage urthane primer sprayed on and then heavily sanded
with 200
400 paper dry. Need to spray another coat of primer
and sand to see if
surface is ready for color coats. At this stage the finish has added
about 3 oz
to the structure.
Has a bit of clean up
work to go, but is getting close to color coats. I
probably will use something different this
time like maybe WHITE, RED, and BLACK. Hmm.
Ann says I am a "touch"
predictable??
Mel Graham
|
Jan 12 - Mickey
Cohen photos
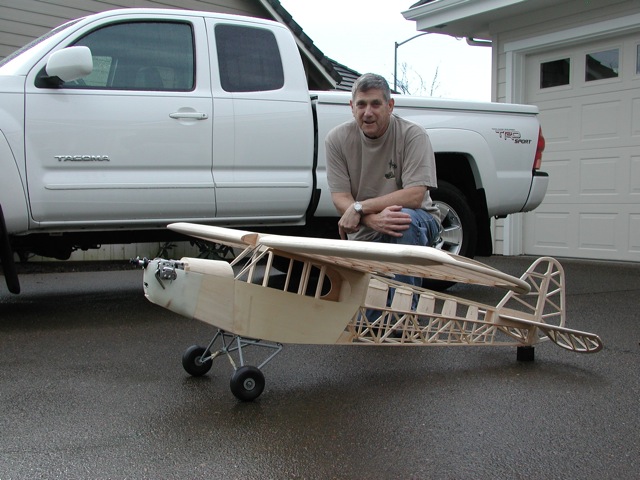
Sig 1/4
scale clipped wing Cub
Here are some
pictures of my winter building
project. It is a . The
wingspand is 86 inches and I expect it to weigh in at 15 pounds. The
power
comes from an OS Gemini 160. The landing gear is a functioning bungee
gear. Mickey Cohen
|
Jan 11 - Kenton Melville photos
|
Nexstar
Here's the stuff I did to my Nexstar in Nov
'09. A few of the guys have seen it out at the field a few times in
December. I
have 27 flights sofar, it's very stable. Just waiting for more sun.
<>Feel free to link a picture
for others to see where/what this
link represents.
Kenton Melville |
|
|